")
Building custom layouts for your WordPress website can be a complex task, but with the help of a page builder, it becomes much more feasible and efficient. In this guide, we will explore the benefits and key features of using a page builder to create custom WordPress layouts. We will also discuss how to choose the right page builder for your needs and provide a step-by-step process for getting started with building your custom layouts. We will delve into advanced techniques for enhancing your layouts and optimizing their performance. By the end of this guide, you will have a comprehensive understanding of building custom WordPress layouts with a page builder and be equipped with the knowledge and tools to create stunning, unique designs for your website. So, let’s dive in and unlock the possibilities of customizing your WordPress layouts!
Key takeaway:
- Building custom WordPress layouts with a page builder maximizes flexibility and creativity, allowing you to create unique designs tailored to your needs.
- The use of a page builder offers numerous benefits, including ease of use, time savings, and the ability to create professional-looking layouts without any coding.
- Selecting the right page builder is crucial, and factors such as compatibility, features, support, and pricing should be considered when making a decision.
- Installing and activating your chosen page builder plugin is the first step towards building custom WordPress layouts, followed by exploring the user-friendly interface.
- Whether you choose to start from scratch or use pre-made templates, a page builder allows you to easily add, arrange, and customize elements on your layout to achieve the desired look.
- Advanced techniques, such as creating dynamic content and using advanced styling options and effects, can take your custom WordPress layouts to the next level.
- Testing and optimizing your custom layout ensures its compatibility across different devices and improves performance and loading speed.
- In summary, building custom WordPress layouts with a page builder empowers you to create visually appealing and functional websites without the need for complex coding.
- By following the tips and guidelines provided, you can achieve success in building custom WordPress layouts and create a website that stands out.
Why Should You Consider Using a Page Builder?
Using a page builder for website design offers multiple advantages. Why Should You Consider Using a Page Builder? It provides flexibility and ease of use, allowing you to create custom layouts without coding knowledge. You have full control over the design and appearance of your website. A page builder also offers pre-made templates that can be easily customized to match your branding and style preferences.
A page builder enhances productivity with drag-and-drop functionality, saving time and effort compared to manual coding. It seamlessly integrates with other plugins and tools, expanding the functionality and possibilities for your website. Why Should You Consider Using a Page Builder? It also ensures a responsive design for different devices, optimizing the user experience.
Choosing to use a page builder enables you to efficiently create professional-looking websites, especially for those without coding skills. Why Should You Consider Using a Page Builder? It is a valuable tool that helps achieve the desired website design without any hassle.
Benefits of Building Custom Layouts with a Page Builder
–
Efficiency: Building custom layouts with a page builder speeds up website development. Use drag-and-drop functionality to quickly add and arrange elements on your layout.
–
Flexibility: Page builders offer pre-made templates and elements, allowing easy customization of website design. Choose from various layouts, colors, fonts, and styles to create a unique and visually appealing website.
–
No coding required: Page builders eliminate the need for coding skills to build a professional-looking website. The user-friendly interface and intuitive tools make it accessible for anyone.
–
Responsive design: Page builders ensure that custom layouts are responsive and optimized for different devices, providing a seamless user experience across desktop, tablet, and mobile.
–
Time and cost savings: By using a page builder, save time and money on website development. Quick and easy editing features allow changes and updates to the layout without hiring a developer or spending hours on coding.
When choosing a page builder, consider features, compatibility with your WordPress theme, ease of use, customer reviews, and support options. Experiment with different page builders to find the one that suits your needs and preferences.
What is a Page Builder?
Discover the magic of page builders – the secret to building stunning custom WordPress layouts! In this section, we’ll unveil the wonders of page builders and unlock their potential for creating beautiful websites. Join us as we explore the key features that make page builders a game-changer in web design. Get ready to unleash your creativity and bring your website visions to life with this powerful tool. Say goodbye to tedious coding and hello to a whole new world of design possibilities!
Key Features of Page Builders
The key features of page builders include:
- Drag-and-Drop Interface: Page builders provide a user-friendly interface that allows you to easily drag and drop elements onto your layout, eliminating the need for coding or technical skills.
- Pre-made Templates: Most page builders offer a wide range of fully customizable pre-designed templates, saving you time when building your website.
- Responsive Design: Page builders ensure that your layouts are responsive and optimized for desktops, tablets, and mobile devices.
- Multiple Content Elements: Page builders come with various content elements such as text blocks, images, videos, buttons, sliders, and more.
- Customization Options: Page builders allow you to easily customize the appearance of your website, adjusting colors, fonts, spacing, and styles to match your brand and create a unique design.
- Integration with Third-Party Plugins: Many page builders seamlessly integrate with popular WordPress plugins, adding features like contact forms, social media sharing, e-commerce, and more.
- Undo and Redo: Page builders provide an undo and redo feature, making it easy to revert changes or mistakes during the design process.
- Optimization Tools: Some page builders offer optimization tools to improve website performance, including caching, minification of CSS and JavaScript files, and image optimization.
These key features make page builders a powerful tool for building custom WordPress layouts, even for users without technical expertise.
Choosing the Right Page Builder
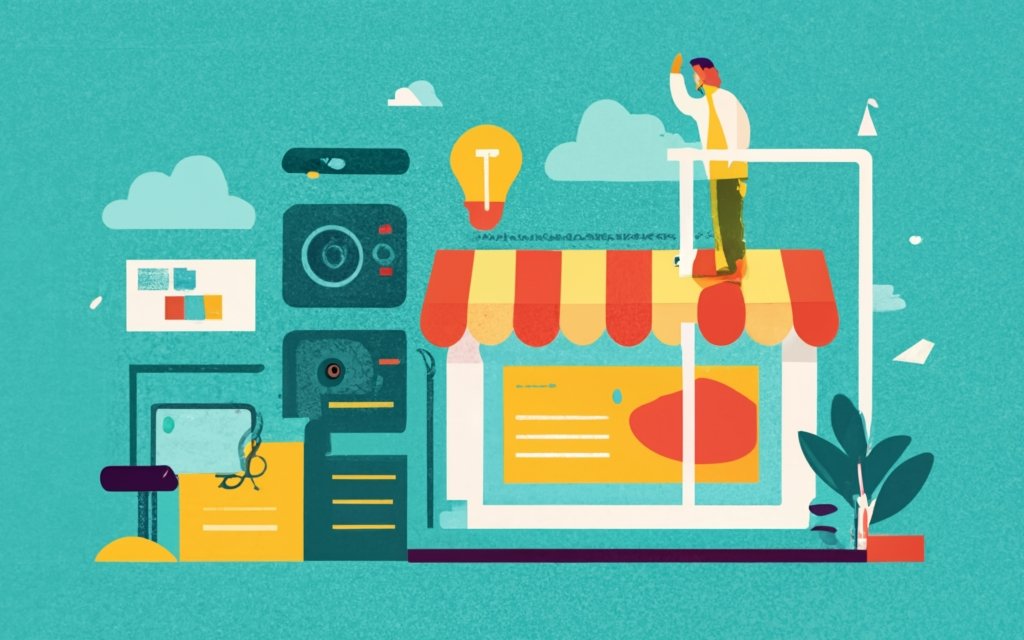
Photo Credits: Www.Uncleb.Tech by Adam Davis
When it comes to building custom WordPress layouts, one crucial decision can make or break your entire design process: the choice of a page builder. In this section, we’ll explore the factors you need to consider when selecting the perfect page builder. From user-friendliness to customization options, we’ll dive into the key aspects that will help you make an informed decision and create stunning websites with ease. So, let’s unravel the secrets of finding the right page builder to elevate your WordPress experience!
Factors to Consider When Selecting a Page Builder
When selecting a page builder for custom WordPress layouts, there are several factors to consider. It is important to prioritize compatibility, user-friendliness, features and flexibility, support and updates, performance, and cost.
Ensure that the page builder is compatible with your current WordPress theme and plugins. This will prevent any compatibility issues that may arise.
Look for a page builder that is user-friendly and intuitive, even for beginners. This will make the process of building your website easier and more enjoyable.
Consider the specific features and functionalities offered by the page builder. Look for options that allow for customization to suit your unique needs and preferences.
Check the availability and quality of support provided by the page builder’s developer. It is important to choose a page builder that receives regular updates and bug fixes to ensure optimal performance.
Take into account the impact of the page builder on your website’s loading speed and overall performance. Look for a page builder that is optimized for speed to enhance user experience.
Evaluate the pricing options and plans offered by the page builder. Consider the value you will receive for your investment.
A true story serves as an example of the importance of considering these factors. A small business owner wanted to revamp their website with a custom WordPress layout but chose a page builder without fully considering compatibility. This led to compatibility issues and forced them to switch to a different page builder, resulting in delays and additional expenses. They have now learned the importance of prioritizing compatibility, user-friendliness, and support when selecting a page builder.
Getting Started with Building Custom WordPress Layouts
Ready to unleash your creativity and build custom WordPress layouts? In this section, we dive into the exciting process of getting started. First, we’ll guide you through the installation and activation of your chosen page builder plugin. Then, we’ll take a closer look at the intuitive and user-friendly page builder interface. Get ready to transform your website into a stunning visual masterpiece effortlessly. Let’s begin this exhilarating journey towards customized WordPress greatness!
Installing and Activating Your Chosen Page Builder Plugin
To install and activate your chosen page builder plugin, simply follow these steps:
- Begin by choosing and downloading a page builder plugin from a trusted source.
- Log in to your WordPress dashboard and navigate to the ‘Plugins’ section.
- Click on ‘Add New’ and then select ‘Upload Plugin’.
- Choose the file for your page builder plugin and click ‘Install Now’.
- Once the installation is complete, click ‘Activate’ to activate the page builder.
- Follow the on-screen instructions for the setup process, which may vary depending on the specific plugin.
- Once the setup is finished, you can start building custom layouts using the page builder plugin.
I recently had a friend who used WordPress to create a website. In order to achieve a unique and visually appealing design, she decided to go with a popular page builder plugin. By following the steps mentioned above, she was able to successfully install and activate the plugin on her WordPress site. The plugin’s user-friendly interface allowed her to design a stunning layout without requiring any coding knowledge. With a wide array of customization options offered by the plugin, she was able to bring her vision to life. Thanks to the easy installation and activation process, my friend was able to quickly begin building her custom WordPress layout.
Exploring the Page Builder Interface
When exploring the Page Builder Interface, you’ll find a range of features and options to customize and design your WordPress layout. Consider the following key aspects:
– Drag-and-drop functionality: Most Page Builders offer a user-friendly interface where you can easily drag and drop elements onto your layout. This allows you to organize your content without coding skills.
– Pre-designed blocks and templates: Page Builders provide a library of pre-designed blocks and templates as starting points for your layout. This saves time and effort in creating a design from scratch.
– Element customization: With a Page Builder, you can easily customize various elements on your layout, such as text, images, and buttons. Adjust colors, fonts, sizes, and other styling options to match your branding or design preferences.
– Responsive editing: Page Builders allow you to preview and edit your layout on different devices and screen sizes. This ensures your design looks great and functions properly on desktops, tablets, and mobile devices.
– Integration with third-party plugins: Some Page Builders integrate with popular WordPress plugins, adding advanced functionality to your layout. Features like contact forms, sliders, and social media feeds can be easily incorporated.
Take your time to familiarize yourself with the available options and experiment with different layouts and design elements. Create a customized and visually appealing WordPress website.
Designing Your Custom Layout
Designing your own custom layout is an exciting venture in the world of WordPress. Whether you’re opting for a pre-made template or starting from scratch, this section will guide you through the process. Learn how to skillfully add and arrange elements on your layout, and get ready to unleash your creativity. We’ll also explore how to customize the colors, fonts, and styles to truly make your website reflect your unique vision. Get ready to take your WordPress site to the next level!
Choosing a Pre-made Template or Starting from Scratch
When it comes to designing a custom WordPress layout, you have the option to either choose a pre-made template or start from scratch. There are several factors to consider when deciding which approach is best for you:
– Time: If you’re working on a tight schedule or need a quick solution, a pre-made template can save you a lot of time. It provides a convenient option.
– Customization: Starting from scratch gives you the freedom to fully customize every aspect of your layout. This allows you to create a design that perfectly aligns with your brand and goals.
– Skills and experience: If you have limited knowledge of web design or coding skills, a pre-made template can be the easier choice. These templates often come with user-friendly interfaces and pre-designed elements, making them more accessible for beginners.
– Budget: Templates can be a cost-effective solution, especially if you have a limited budget. They offer a wide range of options at affordable prices. Keep in mind that more complex and unique templates may come at a higher cost.
Pro-tip: If you opt for a pre-made template, consider customizing it to incorporate unique elements that reflect your brand. This can help make your website stand out, even though you started with a template.
Adding and Arranging Elements on Your Layout
When incorporating and arranging elements on your layout using a page builder, it is important to follow these steps:
1. First, choose a page builder plugin that is suitable for your WordPress website.
2. Next, either create a new page or edit an existing one where you want to design your layout.
3. Access the page builder interface by clicking on “Edit with [Page Builder Name].”
4. From here, you have the option to either select a pre-designed template or start from scratch.
5. Simply drag and drop the desired elements onto the layout canvas to add them to your page.
6. Move these elements around the canvas to achieve the layout and structure that you desire.
7. If necessary, you can also resize these elements accordingly.
8. Customize the settings of each element, such as colors, fonts, and styles, in order to align with your branding.
9. Prior to finalizing your layout, it is advisable to preview it and make any necessary adjustments.
10. Finally, save and publish the page to make your designed layout live on your website.
Following these steps will allow you to easily incorporate and arrange elements on your layout, while using a page builder that gives you complete control over the design of your WordPress website.
Customizing Colors, Fonts, and Styles
Customizing Colors, Fonts, and Styles is essential for building custom WordPress layouts. Here are key considerations:
- Color selection: Choose colors aligned with your brand or design aesthetic. Consider the psychology of colors in evoking emotions or reactions in users.
- Font choices: Select legible and visually appealing fonts. Consider the purpose of your website and the desired tone. Serif fonts are often used for formal or traditional designs, while sans-serif fonts are popular for modern and minimalist styles.
- Typography styles: Pay attention to font sizes, line spacing, and letter spacing for readability. Use various heading styles to create hierarchy and guide users through content.
- Consistency: Maintain consistency in colors, fonts, and styles across your website for a cohesive and professional look. This establishes brand identity and provides a seamless user experience.
- Accessibility: Ensure chosen colors, fonts, and styles comply with web accessibility guidelines. This includes considering contrast ratios for text readability and providing alternative text for images.
In the history of web design, customizing colors, fonts, and styles has evolved with technology and design trends. Early websites had limited font and color options, but advancements in web development tools and techniques have given designers more flexibility and creativity. Nowadays, with page builders and CSS frameworks, customizing colors, fonts, and styles has become more accessible and user-friendly. Designers can easily experiment with different combinations to achieve desired visual effects and create unique and captivating WordPress layouts.
Advanced Techniques for Custom WordPress Layouts
Discover the power of taking your WordPress layouts to the next level with advanced techniques. In this section, we’ll explore exciting ways to customize your WordPress layouts. From creating dynamic content with dynamic data sources to using advanced styling options and effects, you’ll be equipped with the knowledge to achieve unique and engaging designs. So, let’s dive in and unlock the secrets of building exceptional custom layouts for your WordPress website.
Creating Dynamic Content with Dynamic Data Sources
Creating dynamic content with dynamic data sources is crucial for building custom WordPress layouts. By incorporating dynamic data sources, you are able to display real-time information on your website, making it more engaging and relevant to visitors.
There are several benefits to creating dynamic content with dynamic data sources:
- Personalization: Dynamic content tailors displayed information based on individual users, creating a customized experience and increasing user engagement.
- Automation: Connecting your website to dynamic data sources automates the process of updating content, saving time and effort.
- Real-time Information: Dynamic data sources display live data, such as stock prices, weather updates, or social media feeds, providing up-to-date information to visitors.
- Enhanced User Experience: Dynamic content includes interactive elements like maps, search functionalities, or user-generated content, improving the overall user experience.
- Increased Conversion Rates: Relevant and personalized content boosts conversion rates by delivering targeted messages and offers to the audience.
A popular e-commerce website saw an increase in their conversion rates and customer satisfaction by implementing dynamic content. They showcased real-time product recommendations based on users’ browsing history and purchase behavior. This personalized approach created a more tailored and engaging shopping experience by leveraging dynamic data sources.
When building custom WordPress layouts, it is important to remember that incorporating dynamic content with dynamic data sources greatly enhances the functionality and user experience of your website.
Using Advanced Styling Options and Effects
When utilizing a page builder to design custom WordPress layouts, you have the ability to enhance your designs by incorporating advanced styling options and effects. These features allow you to effortlessly create visually stunning and dynamic websites, even without coding expertise.
To effectively employ advanced styling options and effects, it is important to consider the following:
- Personalizing colors, fonts, and styles: Utilize the page builder’s user-friendly interface to modify the appearance of your website. Choose from a diverse range of color palettes, font styles, and formatting options to establish a cohesive and visually appealing design.
- Applying animations and transitions: Infuse your website with dynamism by utilizing the page builder’s animation and transition effects. Apply these effects to buttons, images, and text to create an engaging user experience.
- Implementing parallax scrolling: Generate a captivating effect with parallax scrolling, where various elements of the website move at different speeds, creating the illusion of depth. Employ this feature to add visual interest and create a memorable browsing experience.
- Incorporating hover effects: Engage users and provide interactive elements on your website by incorporating hover effects. Effortlessly add hover effects to buttons, images, and icons using the page builder, allowing users to interact with your content and improve user engagement.
By leveraging the advanced styling options and effects offered by the page builder, you have the ability to create visually stunning websites that captivate your audience. Experiment with different styles and effects to discover the perfect balance that enhances your website’s design aesthetic.
Remember to regularly preview and test your layout on various devices to ensure optimal performance and loading speed. With these tips, you can design custom WordPress layouts that stand out and leave a lasting impression on your visitors.
Testing and Optimizing Your Custom Layout
”
Testing and optimizing your custom WordPress layout is essential for a seamless user experience. In this section, we’ll explore ways to ensure your layout looks great on various devices. We’ll also discuss techniques for improving performance and loading speed. With a summary of our guide on building custom WordPress layouts, we’ll provide you with all the key takeaways. Plus, we’ll wrap up with some final thoughts and valuable tips for your success in creating captivating and efficient websites.
”
Previewing and Testing Your Layout on Different Devices
Previewing and testing your layout on different devices is important for ensuring compatibility and providing a seamless user experience. Here are the steps to follow:
- Use a responsive design: Design your layout to adapt to various screen sizes and resolutions for compatibility with smartphones, tablets, and desktop computers.
- Test on multiple devices: Preview your layout on different devices, operating systems, browsers, and screen sizes to ensure compatibility.
- Check for responsiveness: Verify that your layout retains its design and functionality, ensuring that elements are not cut off, text is readable, and menus are accessible.
- Test interactive elements: Interact with your layout on different devices to ensure buttons, forms, and other interactive elements work as intended. Check for issues with responsiveness, functionality, or user experience.
- Consider different orientations: Test your layout in both portrait and landscape orientations to determine if any adjustments are needed for optimal display.
- Review analytics: Analyze data from user interactions on different devices to gain insights into potential issues or improvements.
By following these steps, you can thoroughly test and optimize your layout for different devices, previewing and testing it to ensure compatibility and a seamless user experience.
Optimizing Performance and Loading Speed
To maximize performance and improve loading speed while constructing custom WordPress layouts with a page builder, it is important to follow A Guide to Building Custom WordPress Layouts with a Pagebuilder
- Prioritize Image Optimization: Make sure to compress and optimize images to reduce their file size without compromising the quality. This practice positively impacts the loading speed of your website.
- Implement Caching Techniques: Introduce caching plugins or utilize server-level caching to store static versions of your website. This helps in decreasing the response time of the server.
- Limit Plugin Usage: Only employ essential plugins and regularly update them. Avoiding unnecessary plugins is crucial as they can slow down the performance of your website.
- Enhance CSS and JavaScript: Minify CSS and JavaScript files to reduce their size and enhance the loading speed of your website.
- Utilize Content Delivery Networks (CDNs): CDNs distribute your website’s content geographically across multiple servers. This ensures that users receive the content from the server closest to them, minimizing latency and improving speed.
- Optimize the Database: Regularly clean up your database by removing unnecessary data, optimizing tables, and utilizing database optimization plugins.
- Select a Reliable Hosting Provider: The choice of a fast and dependable hosting provider significantly impacts your website’s performance and loading speed.
Pro tip: Regularly evaluate your website’s performance using tools such as Google PageSpeed Insights or GTmetrix. This will help you identify areas for improvement and ensure an optimal loading speed for your visitors.
Summary of Building Custom WordPress Layouts with a Page Builder
Building custom WordPress layouts with a page builder plugin provides the opportunity for users to create professional and unique websites without the need for coding skills or hiring a developer. The process involves selecting and activating a page builder plugin, then exploring its user-friendly interface. From there, users can start designing their custom layouts by selecting pre-made templates or starting from scratch. They have the ability to add and arrange various elements, as well as customize colors, fonts, and styles to suit their branding.
For more advanced techniques, users can create dynamic content by utilizing dynamic data sources. They can also take advantage of advanced styling options and effects to enhance the visual appeal of their layouts.
Once the layout is finalized, it is important to ensure its responsiveness and adaptability on different devices. This can be achieved by previewing and testing the layout on various devices. Additionally, optimizing performance and loading speed is crucial to provide a seamless user experience.
Final Thoughts and Tips for Success
1. Plan your layout: Outline your website goals, target audience, functionality, and aesthetics before beginning the design process.
2. Utilize pre-made templates: Use the library of pre-designed templates offered by page builders as a starting point for your custom layout.
3. Experiment with different elements: Don’t hesitate to try different components and combinations to achieve the desired look and feel.
4. Prioritize responsiveness: Ensure your custom layout looks and functions well on different devices and screen sizes. Test it on various devices for full responsiveness.
5. Optimize for speed: Improve user experience and search engine optimization by minimizing heavy elements, optimizing images, and implementing caching techniques.
6. Stay updated: Keep up with updates and new features of your chosen page builder plugin. Regularly check for updates to ensure optimal performance and security.
7. By following these tips, you can create visually appealing, functional, and optimized custom WordPress layouts for optimal user experience.
Frequently Asked Questions
What is a custom page in WordPress?
A custom page in WordPress refers to a page that has a different layout and design from the rest of your website. It allows you to display different types of content and customize the page’s appearance and functionality according to your needs.
How can I create a custom page in WordPress?
There are several methods to create a custom page in WordPress. You can use the block editor, such as the method described in the first FAQ, which allows you to visually build your page using blocks and customize the design. You can also use plugins like SeedProd or Thrive Architect to create custom pages using a drag-and-drop interface. Alternatively, you can create a custom page template manually by editing template files.
What is a custom page template in WordPress?
A custom page template in WordPress is a specific file that controls the layout and design of a particular page on your website. It allows you to dramatically alter the appearance and functionality of that page, such as creating a unique header or adding an additional sidebar.
Can I customize the design of a custom page in WordPress?
Yes, you can customize the design of a custom WordPress page using the methods mentioned earlier. With the block editor, plugins like SeedProd or Thrive Architect, or manual template creation, you have the flexibility to add elements, change typography, layout, and other settings to create unique designs for your custom pages.
Do I need coding knowledge to create a custom page template?
Creating a custom page template manually does require some coding knowledge. You will need to work with HTML, template tags, and PHP code. Using plugins like SeedProd or Thrive Architect allows you to create custom pages without coding knowledge, as they provide a drag-and-drop editor interface.
How can I ensure my custom page templates won’t be affected by theme updates?
To ensure that your custom page templates won’t be overwritten by theme updates, it is recommended to use a child theme. By creating a child theme, any changes you make to the template files won’t be lost when the parent theme gets updated. This gives you more control and flexibility in preserving your custom page designs.