")
Configuring server caching is an essential aspect of optimizing WordPress hosting on a Virtual Private Server (VPS). To understand the significance of server caching and its role in enhancing website performance, it is crucial to grasp the fundamentals of VPS hosting.
VPS hosting is a type of web hosting where a physical server is divided into multiple virtual servers, each having its resources, operating system, and dedicated storage. This allows better control, performance, and scalability compared to shared hosting.
When it comes to WordPress hosting on a VPS, server caching plays a vital role in improving website speed and overall performance. Server caching refers to the process of temporarily storing frequently accessed data in a server’s memory. This allows subsequent requests for the same data to be served faster, reducing the load on the server and improving response times.
To configure server caching for WordPress hosting on a VPS, it is essential to understand the different types of caching. Server-side caching involves caching data on the server, while client-side caching involves caching data on the user’s device.
Configuring server caching involves a few key steps. First, selecting the right caching plugin is crucial. Popular options include W3 Total Cache, WP Super Cache, and WP Rocket. Once installed and activated, the caching plugin allows you to configure basic caching settings, enable object caching, and enable Gzip compression for further optimization. Configuring browser caching is also beneficial as it allows returning visitors to load your site more quickly.
To optimize server caching on VPS for WordPress hosting, additional tips include using a Content Delivery Network (CDN) to deliver content more efficiently, optimizing images and minifying files to reduce file sizes, and regularly monitoring and updating plugins to ensure compatibility and performance.
By following these steps and implementing optimization techniques, you can significantly improve server caching on a VPS for WordPress hosting, resulting in a faster and more efficient website performance.
Key takeaway:
- Server caching improves WordPress hosting performance: Configuring server caching on VPS for WordPress hosting can significantly enhance website speed and responsiveness, providing a better user experience for visitors.
- Choose the right caching plugin: The selection of a suitable caching plugin is crucial for effective server caching. It should be compatible with your hosting environment and offer advanced features like object caching, gzip compression, and browser caching.
- Optimize server caching with additional techniques: To further optimize server caching on VPS for WordPress hosting, consider using a Content Delivery Network (CDN), optimizing images and minifying files, and regularly monitoring and updating plugins.
What is VPS Hosting?
VPS hosting is a type of web hosting that provides virtual private servers for websites. So, what exactly is VPS hosting?
This setup divides a physical server into multiple virtual servers, each with its own dedicated resources and operating system. VPS hosting offers more control and flexibility compared to shared hosting. Users can customize their server settings and install software of their choice.
It is ideal for websites that require higher performance, reliability, and security. With VPS hosting, users can expect faster loading times, better website performance, and the ability to handle higher traffic volumes.
It is a cost-effective solution for businesses and individuals who need more resources and control over their hosting environment. VPS hosting bridges the gap between shared hosting and dedicated server hosting, offering affordability and functionality.
Why is Server Caching Important for WordPress Hosting on VPS?
Server caching is essential for WordPress hosting on VPS because it plays a crucial role in improving website performance and load times. By temporarily storing frequently accessed website data, server caching allows for faster retrieval, reducing strain on server resources and optimizing user experience.
The implementation of server caching not only enhances website speed and responsiveness but also contributes to higher search engine rankings. It achieves this by reducing data transfer between the server and visitor’s browser, resulting in faster page loading times and improved user engagement.
Server caching improves the scalability and efficiency of WordPress hosting on VPS. By reducing server load, caching enables the hosting environment to handle more simultaneous visitors, ensuring that the website remains accessible and responsive even during periods of high traffic.
Historically, server caching has been utilized for years to optimize website performance. As websites have become more complex and require faster loading times, caching has emerged as an effective solution to reduce server strain and boost page load speed. Today, it remains an indispensable component of website optimization, particularly in WordPress hosting on VPS. The proven effectiveness of server caching in enhancing website performance has made it an essential tool for website owners worldwide.
Understanding Server Caching for WordPress on VPS
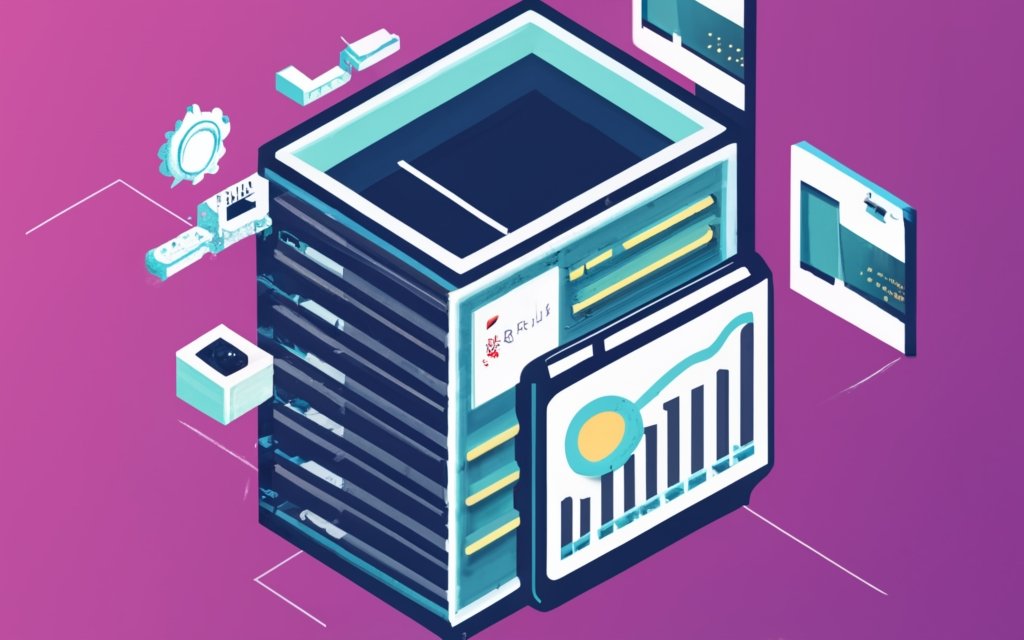
Photo Credits: Www.Uncleb.Tech by Jordan Jackson
Understanding Server Caching for WordPress on VPS
When it comes to server caching for WordPress on VPS, follow these steps:
1. Install a caching plugin like W3 Total Cache or WP Super Cache. These plugins optimize your WordPress site and improve performance.
2. Enable caching through the settings of the chosen caching plugin.
3. Configure caching settings based on your website’s needs, including options like page caching, object caching, and database caching.
4. Test your website to ensure caching is working properly, and monitor performance for improvements in speed and loading times.
5. Clear the cache whenever making changes to your website, such as updating content or installing new plugins. This ensures visitors see the most up-to-date version of your site.
By following these steps, you can gain a better understanding of server caching for WordPress on VPS and optimize your website’s performance.
What is Server-Side Caching?
Server-side caching is a technique used to enhance website performance by storing frequently accessed data on the server. It works by creating static copies of web pages and storing them in the server’s memory or storage. When a web page is first accessed, a cached version is generated and stored. Subsequent requests for the same page can then bypass the time-consuming process of generating the page from scratch and instead deliver the cached version directly. This not only reduces response time but also improves the overall user experience.
One of the advantages of server-side caching is its ability to handle high traffic loads without overburdening the server. By serving cached versions of web pages, the server can efficiently manage multiple simultaneous requests, resulting in improved performance and decreased server load.
This caching technique is particularly beneficial for WordPress websites. It optimizes the performance of dynamic content-driven sites by caching static versions of frequently accessed pages. This significantly reduces the need for database queries and processing time, resulting in faster page loading times and improved overall performance.
In summary, server-side caching is a valuable tool for enhancing website performance, especially for dynamic content-driven sites. By storing frequently accessed data and delivering cached versions of web pages, the server can handle high traffic loads efficiently, resulting in improved user experience.
What is Client-Side Caching?
Client-side caching is a technique that stores web page resources on the user’s device, resulting in improved performance and faster load times. When a user visits a website, their browser downloads necessary files such as HTML, CSS, JavaScript, and images. Instead of continuously requesting these files from the server every time the user visits the site, the browser retrieves them from its cache. This caching process allows for quicker load times.
To enable client-side caching, web developers can add cache control headers to the server response. These headers specify how long the browser should store the resources in its cache. Techniques like minification and file compression can be employed to optimize the cached resources further.
To achieve optimal performance, it is important to regularly monitor and update caching settings. Consider implementing strategies such as using a content delivery network (CDN), optimizing images, and minifying files. These practices will enhance the benefits of client-side caching and ensure a seamless browsing experience.
How to Configure Server Caching for WordPress Hosting on VPS
Looking to supercharge your WordPress hosting on a VPS? Get ready to optimize your website’s performance with server caching! In this guide, we’ll walk you through the step-by-step process of configuring server caching for WordPress hosting on a VPS. From choosing the perfect caching plugin to enabling browser caching and gzip compression, we’ve got you covered. Say goodbye to slow loading times and hello to improved website speed and user experience. Let’s dive in!
Step 1: Choose the Right Caching Plugin
When setting up server caching for WordPress hosting on VPS, the first step is choosing the right caching plugin. Here’s how:
1. Research and compare caching plugins for WordPress. Look for popular options with good reviews and a strong reputation.
2. Determine your caching needs. Consider factors like website size, traffic volume, and customization level.
3. Evaluate plugin features. Look for functionalities such as page caching, object caching, database caching, and CDN integration.
4. Consider compatibility with your VPS hosting environment. Ensure the caching plugin is compatible with your server configuration without conflicts.
5. Check for ongoing support and updates. Ensure the caching plugin is regularly updated for compatibility with the latest WordPress versions and plugins.
6. Test the caching plugin before finalizing your choice. Install and activate the plugin on a test or staging site to assess its performance and impact on website speed.
7. Based on research, evaluation, and testing, select the caching plugin that best suits your needs and goals for server caching on VPS for WordPress hosting.
Step 2: Install and Activate the Caching Plugin
Install and activate the caching plugin for your WordPress hosting on VPS by following these steps:
- Access your WordPress admin dashboard.
- Go to the “Plugins” section in the left-hand column.
- Click on the “Add New” button.
- In the search bar, type the name of the caching plugin you want to install.
- Once you find the desired plugin, click on the “Install Now” button.
- Wait for the plugin to be installed, and then click on the “Activate” button.
- You have successfully installed and activated the caching plugin for your WordPress hosting on VPS.
By installing a caching plugin, you can improve the performance and speed of your WordPress website. It stores static file versions of your dynamic content, reducing page load times.
To optimize the caching plugin, consider these suggestions:
- Configure the caching plugin to meet your website’s specific needs.
- Regularly update the caching plugin to benefit from the latest features and improvements.
- Ensure compatibility with other plugins and themes to avoid conflicts.
- Test your website’s performance after activating the caching plugin to ensure desired results.
By following these steps and suggestions, you can effectively install and activate the caching plugin for your WordPress hosting on VPS, enhancing the speed and overall performance of your website.
Step 3: Configure Basic Caching Settings
When configuring basic caching settings for WordPress hosting on VPS, follow these steps:
- Access your WordPress dashboard and go to the “Settings” menu.
- Click on “WP Super Cache” (or any other chosen caching plugin) to access the plugin’s settings.
- Under the “Easy” tab, enable caching by checking the box next to “Caching On” or a similar option. This activates basic caching functionality.
- Set the “Cache Timeout” or “Expiration Time” to a reasonable value. This determines the duration for which the cached files will be stored before being refreshed. A recommended value is 2-4 hours.
- If your website includes dynamic content or logged-in user accounts, you may need to enable “Caching for Logged In Users” or a similar option. This allows the caching plugin to serve cached pages to logged-in users.
Configuring basic caching settings can improve the performance and speed of your WordPress website. Enabling caching and setting appropriate expiration times ensures that visitors receive cached versions of your pages, reducing the load on your VPS server and improving the overall user experience.
Remember to regularly monitor and test your caching setup for optimal performance and make adjustments as needed.
Step 4: Enable Object Caching
Step 4: Enable Object Caching
To enable object caching for WordPress hosting on VPS, follow these steps:
- Choose a caching plugin that supports object caching for WordPress, such as WP Rocket, W3 Total Cache, or WP Super Cache.
- Install and activate the caching plugin on your WordPress website.
- Access the plugin settings and go to the caching options.
- Enable object caching by toggling the corresponding option.
- Save the changes and clear any existing cache on your website.
Enabling object caching can greatly improve the performance of your WordPress website. It stores frequently accessed database queries and other data in the server’s memory, reducing the need to generate the same data repeatedly. This results in faster page load times and enhanced user experience.
Object caching has been a crucial optimization technique for websites using WordPress hosting. By storing frequently used data in memory, servers can retrieve and serve the data more quickly, reducing overall response time. Object caching has played a key role in improving WordPress performance by allowing websites to handle increased traffic and deliver content efficiently.
Step 5: Enable Gzip Compression
When optimizing server caching on VPS for WordPress hosting, it is important to enable Gzip compression. By following these steps, you can enable Gzip compression and significantly improve your WordPress website’s performance.
Step 1: Access your server’s configuration file.
Step 2: Locate the section for Gzip compression.
Step 3: Enable Gzip compression by setting the appropriate value in the configuration file.
Step 4: Save the changes to the configuration file.
Step 5: Restart the server to apply the changes.
Enabling Gzip compression reduces the file size of your website’s resources, resulting in faster loading times. This not only enhances the user experience but also boosts search engine rankings. So, don’t forget to enable Gzip compression for better WordPress website performance.
Step 6: Configure Browser Caching
To configure browser caching for WordPress hosting on a VPS, follow these steps:
Step 1: Access your server’s configuration file through the terminal or an FTP client.
Step 2: Locate the section in the Apache configuration file where browser caching settings are defined.
Step 3: Add the necessary directives to enable browser caching. These directives specify the caching duration for different file types.
Step 4: Set the expiration time for specific file types. For example, HTML files can be cached for 24 hours, CSS files for 7 days, and images for 30 days.
Step 5: Save the configuration file and restart the Apache server to apply the changes.
Step 6: Verify browser caching functionality by checking the response headers of your website’s resources. The headers should include caching directives like “Cache-Control” and “Expires”.
Configuring browser caching can boost the performance of your WordPress website by reducing server requests and improving page load times for returning visitors. By setting caching durations for files, you can ensure that visitors’ browsers store these files locally, resulting in faster page load times.
Additional Tips for Optimizing Server Caching on VPS for WordPress Hosting

Photo Credits: Www.Uncleb.Tech by Alan Garcia
Looking to supercharge your VPS server caching for WordPress hosting? In this section, we’ll dive into some additional tips and tricks to optimize your server caching setup. From leveraging the power of a Content Delivery Network to optimizing images and minifying files, we’ve got you covered. And don’t forget the importance of regularly monitoring and updating plugins to ensure peak performance. Ready to take your website speed to the next level? Let’s get started!
Use a Content Delivery Network
A content delivery network (CDN) is a network of servers in different locations. By using a CDN, you can distribute your website’s content to multiple servers for faster and more efficient delivery. When a user visits your website, the CDN serves the content from the closest server to their location. This reduces latency and improves page loading times, creating a better user experience. A CDN also reduces bandwidth usage on your VPS server by caching and directly delivering static content like images and videos. By offloading content delivery to the CDN, your VPS server can focus on processing dynamic content and user interactions. Using a CDN improves website scalability and reliability, as CDN servers can handle high traffic volumes and provide redundancy. Popular CDN providers include Cloudflare, Akamai, and Amazon CloudFront.
Optimize Images and Minify Files
Optimizing images and minifying files are essential for improving the performance of a WordPress website hosted on a VPS. To effectively optimize images and minify files, follow these steps:
– Step 1: Before uploading images to your website, resize and compress them using image editing software or plugins. This will reduce file size without compromising image quality.
– Step 2: Choose the appropriate image format for each image on your website. For photographs, use JPEG. For images with transparency or sharp edges, use PNG. For scalable graphics, use SVG.
– Step 3: Improve website loading speed by enabling lazy loading. This delays image loading until they are visible on the screen, especially useful for pages with many images.
– Step 4: Enhance loading time by minifying HTML, CSS, and JavaScript files. Remove unnecessary characters like white spaces and comments to reduce file size.
– Step 5: Utilize caching for static resources such as images, CSS, and JavaScript files. This can be done through caching plugins or server configurations, reducing server load and improving website performance.
– Step 6: Reduce the number of HTTP requests made by the browser by combining and bundling CSS and JavaScript files. This bundling of multiple files into one minimizes loading time.
– Step 7: Regularly review and optimize your website’s images and files to identify further optimization opportunities. Keep your plugins up to date to benefit from new optimization features.
By implementing these steps, you will not only improve website loading speed but also enhance the overall user experience of your WordPress website.
Regularly Monitor and Update Plugins
Regularly monitoring and updating plugins is essential for maintaining optimal performance and security on your WordPress website hosted on VPS. Follow these steps to ensure a smooth updating process:
- Set up a regular schedule for checking plugin updates, whether it’s weekly, bi-weekly, or monthly. Tailor the frequency based on the updates’ availability and your website’s criticality.
- Access your WordPress dashboard and navigate to the “Plugins” section.
- Look for available updates and identify plugins requiring updates by checking for notifications next to their names.
- Before updating, create a backup of your website. This precautionary measure allows you to revert to the previous version if any issues arise during the update process.
- Begin updating the plugins one by one, starting with the most critical ones. This approach enables you to closely monitor each update’s impact on your website’s performance and functionality.
- After updating each plugin, explore different sections of your website to ensure proper functioning. Pay attention to any error messages or conflicts that may occur.
- If an updated plugin causes issues, revert to the previous version using the plugin’s settings page or seek assistance from the developer.
To ensure a streamlined updating process, consider these additional suggestions:
- Regularly review and remove unused plugins to minimize security risks and reduce server load.
- Maintain a record of installed plugins, including version numbers and sources.
- Stay updated on the latest plugin vulnerabilities and security best practices through reputable sources like WordPress security blogs and forums.
By regularly monitoring and updating plugins, you will keep your WordPress website running smoothly while reducing the risk of security breaches and compatibility issues.
Frequently Asked Questions
What is server-side caching and how does it prevent loss of visitors?
Server-side caching involves the temporary storage of frequently-accessed data, reducing the need for repeated requests and allowing for quicker access. By caching data on the server, websites can load faster, preventing slow load times that can lead to a loss of visitors.
How can server-side caching improve the performance of a WordPress installation?
Server-side caching significantly reduces page load times if properly configured. By enabling server-side caching for a WordPress website, you can optimize its performance and ensure quick loading sites, reducing latency and providing a better experience for visitors.
What are some recommended server-side caching software options for WordPress hosting?
For WordPress hosting, recommended server-side caching software options include Varnish, Memcached, and Squid. These caching software can effectively keep websites loading fast, especially during high traffic periods, enhancing the visitors’ experience and preventing loss of revenue.
What is browser caching and how does it contribute to faster website loading?
Browser caching reduces server load and speeds up websites by instructing the browser to cache static files, such as images, JavaScript, and CSS files, and only request them if they have changed. By caching these files in the browser, subsequent visits to the website can be quicker as the files don’t need to be fetched from the server again.
What is the recommended third-party caching plugin for WordPress sites?
For WordPress sites, WP Super Cache, W3 Total Cache, and WP-FFPC are popular and recommended third-party caching plugins. These plugins offer additional features like GZIP compression, minification, content delivery networks (CDNs), and more, further optimizing website speed.
How can I configure server-side caching for my WordPress installation?
To configure server-side caching for a WordPress installation, you can use the hosting Control Panel. Content caching may already be enabled if you installed WordPress using the WordPress Manager section of the Control Panel. Otherwise, you can enable it by following the instructions in the “Optimizing WordPress” article.